Check it Out! I am so excited to decorate for Christmas and I have been feeling so creative lately! The Christmas commercials are starting on TV and I keep hearing some Christmas music so I am getting itchy!
I was driving down to the mall the other day and saw a beautiful fall arrangement on a mailbox and I thought, "I can make that!" so today's craft is inspired by that arrangement I saw but with a Christmas theme.
I had that swag left over from my swag to tree up cycle craft, you can check it out HERE, if you missed it, and I decided it would be perfect for my base, all I had to do was bend it!
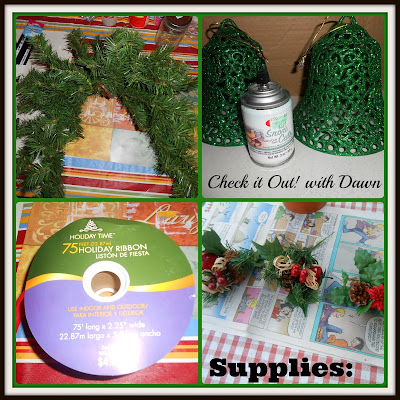
My supplies were pretty basic and cheap! I found these really great glittered/plastic bells at The Dollar Tree and I had 3 picks that survived some of the Christmas supplies found after the fire. They have no physical damage, just smell, but will still work fine outside! I also used ribbon. My neighbor gave me this awesome roll of holiday ribbon, the kind with the plastic backing, so I knew it would be good to use outdoors.
I also used hot glue, twist ties and a spray sealer to keep everything more weather resistant.
So here is how I put it together:
- Step 1 - I sprayed the bells with two coats of the sealer. Then I allowed them to dry over night. I bent the swag into a U shape that would fit nicely over the top of my mailbox. I used a tall slim box as my work base.
- Step 2 - I attached the bells, using the string on the bells, to each side of the swag.
- Step 3 - I cut 4 strips of ribbon to make single bows for stacking. This is a super easy way to make a large bow!
- Step 4 - Fold the strips in half, I use bread ties to cinch them closed in the center, making 4 single loop bows.
- Step 5 - Layer the single loop bows in opposite directions in the top center of the swag. I added a pick to each side of the bow and one in the center. You could add more pinecones and picks and really fill it up, but I was working with what I had at the moment.
- Step 6 - I then attached a piece of ribbon to each side under each bell and a string on the underside so that I could wrap it around the mailbox to secure it.
- Step 7 - I then sprayed the entire arrangement with another 2 coats of sealer and allowed it plenty of time to dry.
I love how it turned out and I really love that it only cost me $2 to make it!
Do you decorate your mailbox for the holidays?


How adorable!!! I would so love to make this for ours, I just don't like how our mailbox is across the street and kids like to take things off of them!! :( Maybe I'll make it for my railing near the porch!! Thanks Dawn!!
ReplyDeleteWow that's really cute. I honestly don't decorate our mailbox at all.
ReplyDeleteYou are so stinkin' creative I love it! I don't have that kind of mailbox, if I did, I would totally copy you!
ReplyDelete