Check it Out! If you know me, you know I absolutely love making something from nothing. To be able to turn an object that would otherwise end up in the trash into something usable and attractive is a fun challenge to me!
I love this craft because given the size of the tubes it's great for using up scraps of paper.
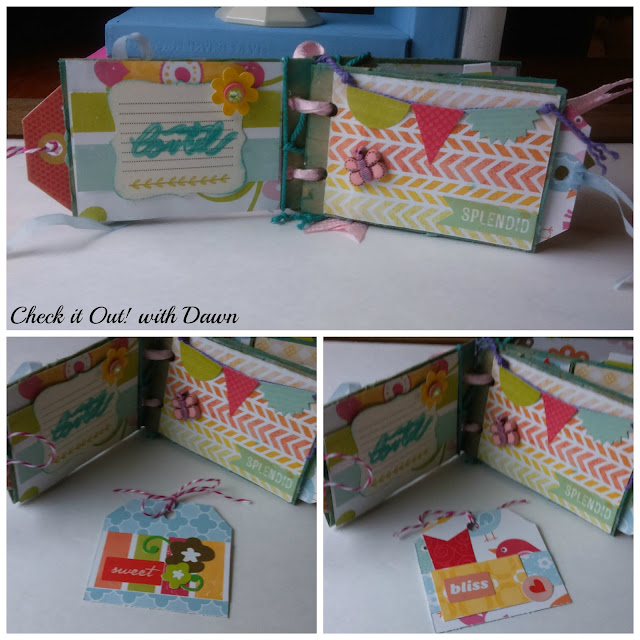
Here are the inside pages of my mini toilet tissue tube album.
This specific album was made with my daughter in mind. Using no pictures, each page and tag lists words for some thing she is to me.
Each tag is decorated on both sides. There are also a couple smaller tags in the inside pockets as well as one in a top pocket.
This page has a flap that lifts up and there is even a tiny tag in a tiny pocket.
I made this entire album using 6 tissue tubes and a folder of left over paper scraps and stickers from a kit. All the supplies used are listed below.
So now here is the basics for making the album. My supplies included:
- Toilet tissue tubes
- Ribbon/String
- Ink pad
- Hot Glue
- Scrapbook Adhesive
- Glue Dots
- Scissors
- Decorative Scissors
- Ruler
- Assorted scrapbook papers
- Assorted embellishments
- Tags
I recommend flattening the tissue tubes. As you collect them, flatten them and clip them together with binder clips. Doing this over time will make them super flat with ease. These tubes vary in size according to manufacturer, so you will also want to check that they are pretty much the same sizes.
You can use the tubes just as they are to create pages, or you can attach two together to make the pocket pages. To attach the tubes, simply measure each tube halfway in and cut one end on each side along the fold. Then you can insert one into the other.
Now fold back the flaps and glue on three edges to create a pocket on each side. Be sure and remember which side is up so both pockets have the opening on the topside. Because one end of my album has holes for the ribbon to bind them all together I create a tiny pocket with that flap. You can see that in the photo above with the tiny tag. I use decorative scissors to cut a bit off the small pockets.
To make the tubes look less like the cardboard that they are I inked the edges. You could also just paint them, but this is faster and does the trick. I recommend inking the inside of the tubes on the end that will be your pockets as well. Doing this before you hot glue the ends makes the inking and painting easier.
To create the flap page, you will need to cut one tube all the way across one edge and trim a little off the end. Using decorative scissors gives it a more distinctive look. Now glue the cut tube to an uncut tube along three edges leaving one long edge unglued if you want the top pocket.
Again you will want to make sure you have them all lined up with the tops facing the same way. Punch two holes in one side to allow for the ribbon to bind the pages together. You will want to make sure you hot glue this end together as well.
After attaching my desired paper to the pages, I used my binder clip to hold the pages together again as I thread my ribbon through the holes. Then I tied bows with them to finish the binding off.
And now the fun begins... Time to decorate! Again I used scraps, stickers, tags, flowers and a "You are" stamp.
I absolutely love the way this turned out and my daughter will too! I can't wait to give it to her! And because I have a ton of tubes, I plan to make many more of these little albums.
I'm working on this one now!
What do you think of my little albums? Would you consider using tissue tubes for an album?


Oh my goodness, you are all too clever... Like Toilet Paper Tubes, seriously? I need your brain.
ReplyDelete