

Check it Out! I love Pinterest and have found some amazing ideas on there including this one. The thing is it was for sale in an etsy store and had no instructions. So I figured out how to make it on my own and it was super easy.
I love crafts that involve recycling and repurposing and apparently wearing pop tops is cool and we have tons of them, so here is my easy to make version of the pop top bracelet.

First up you will want to collect your pop-tops, make sure you have rinsed them well first so they aren't sticky and allow to dry completely. You will also want to make sure that your tops don't have a sharp edge on the back side.

I used about 19 tops to make this bracelet, 2 pieces of ribbon about 17" each, the thinner kind works best and a button to make the closure.

It seems a little complicated, but it really is a few steps, repeated over and over 'til you reach your desired length.
Making sure your pieces are lined up the same, start by running your 2 strands of ribbon under a pop top and then through the top of another...

the easiest way to do the next step is to flip your top piece over and then go back through the first piece to secure it...

now introduce your next pop top by threading from underneath, it will line up with the first one...

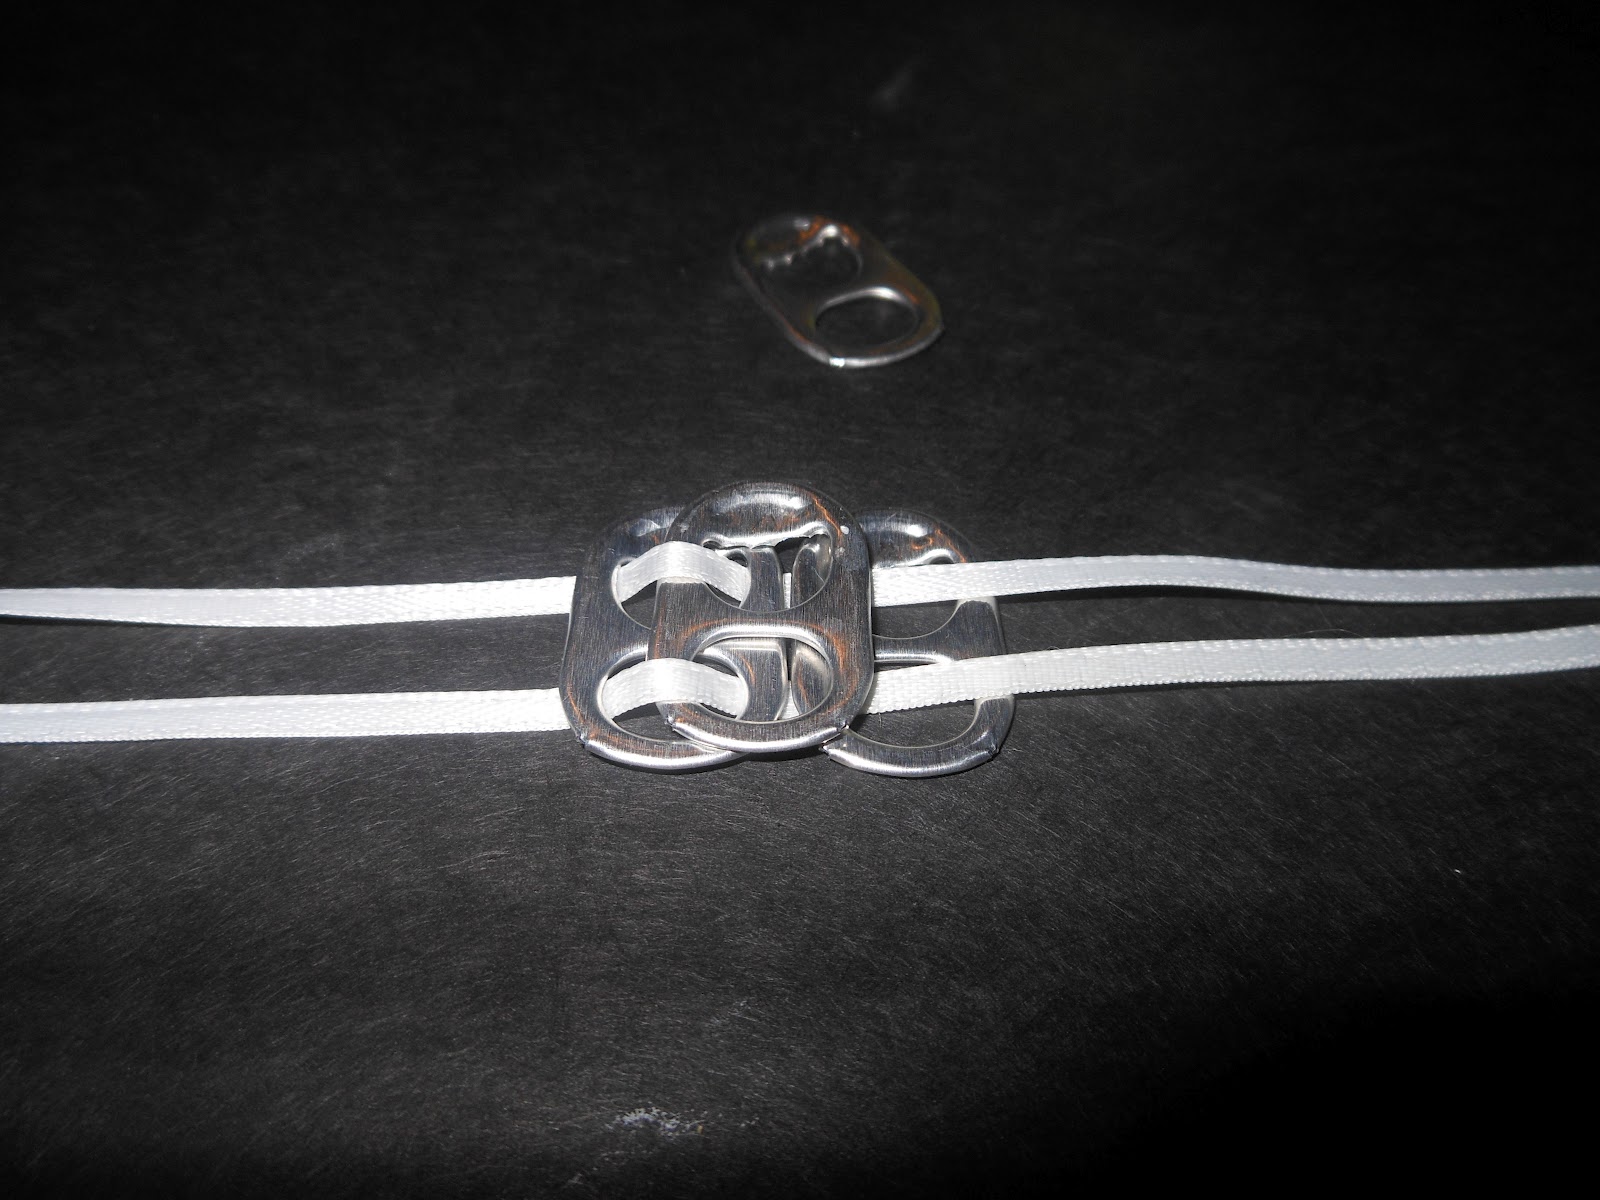
using the same flip over technique, thread your ribbons back through the top (2nd one) pop top from underneath...


now thread your 4th pop top through the top and then finish off by threading ribbons back through piece #3 so your ribbons finishes on the under side...

Now just repeat those steps until you reach your desired length.
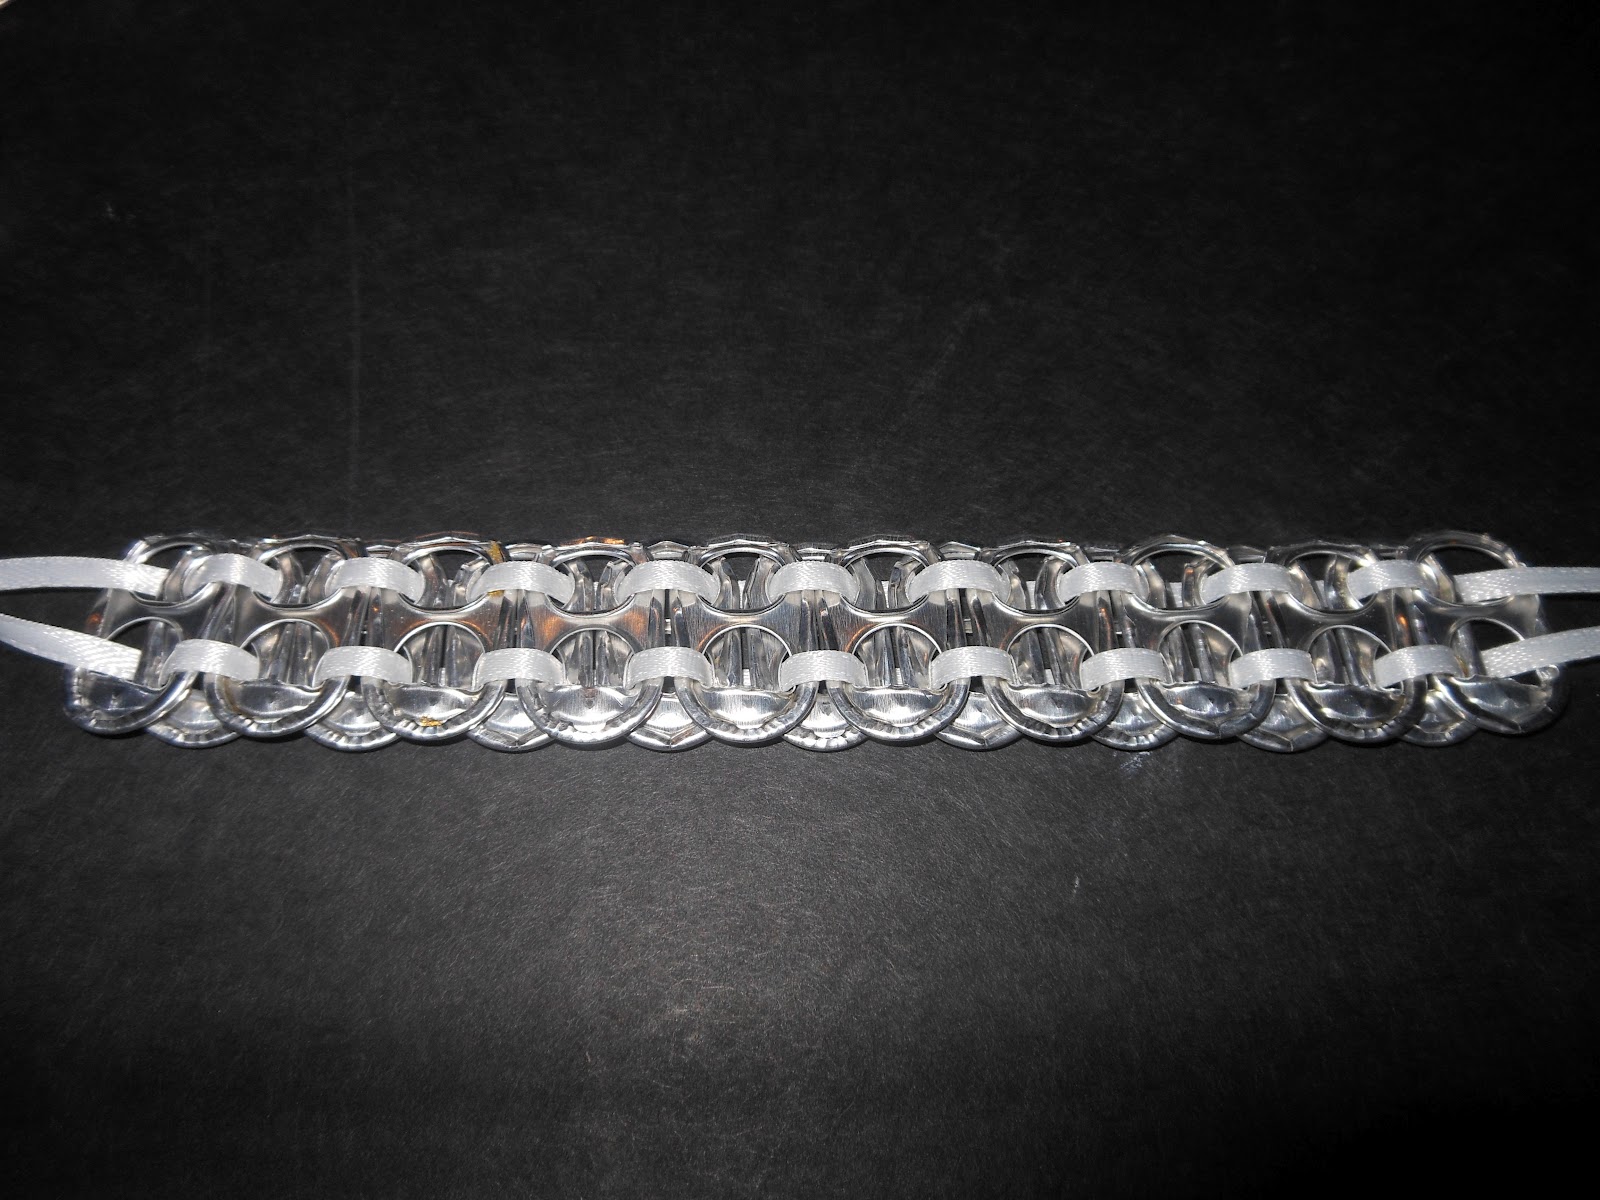
When your done, tie off your ends, not pulling the ribbons too tightly, you want some give for it to wrap around your wrist.

For my closures I just knotted the ribbon over and over until it comes out beyond the pop tops and then knotted off a loop that my button will just barely fit through...

Same thing for the other end...

Except instead of making a loop, tie on the button. Trim your long ends...

And... tada!!!


You could string them with stretchy cord and it will stretch more for a choker or use patterned shoelaces for a super cool belt!
I love it!! I've got something like this as a belt saved in my "to do" list and now I can make a bracelet to match!! Pinned & Tweeted!
ReplyDeleteWhat a cute craft. Great way to upcycle.
ReplyDeleteReally neat, but it still seems too complicated to wrap my brain around LOL!
ReplyDelete